If you’re interested in getting started making beats, FL Studio by Image Line is an excellent Digital Audio Workstation (DAW) to use. And this is just one of these reasons it’s my top DAW for music production in 2021. Its user interface is intuitive and fun to use. It makes the process of making beats easy to pick up for beginners without sacrificing quality in sound. This FL Studio beginners guide for beatmakers will teach you the core elements of the interface and help you get started on your beatmaking journey.
Millennial Mind Sync has affiliate partnerships. These do not influence editorial content, though Millennial Mind Sync may earn commissions for products purchased via affiliate links.
Understanding the FL Studio user interface
When you open up an empty project in FL studio for the first time, this is what it will look like. You’re starting out with a blank canvas for the beat you’ll be creating. If it looks a little overwhelming at first, don’t be discouraged. That is the purpose of this FL Studio beginners guide for beatmakers.
FL Studio playlist arrangement window
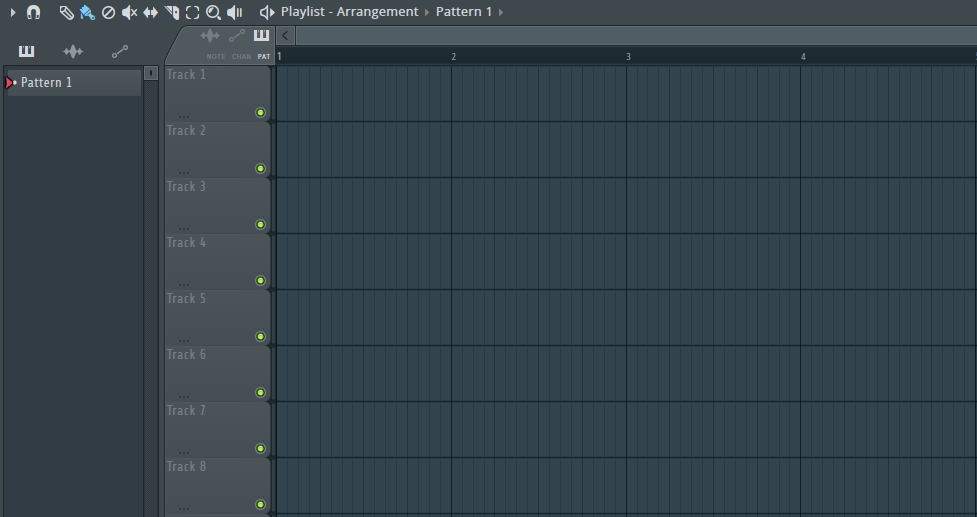
When you open FL Studio, the main window to the far right of your screen will be the Playlist window. Here you will be able to arrange the different musical patterns you create into your final beat. For example, you can make a lead synth pattern, a pattern for chords, a drum pattern, etc. How you want to structure the composition of your beat is up to you, and the playlist window is where you will arrange it all. First, let’s take a look at the channel rack which is how you will compose these different elements for arrangement.
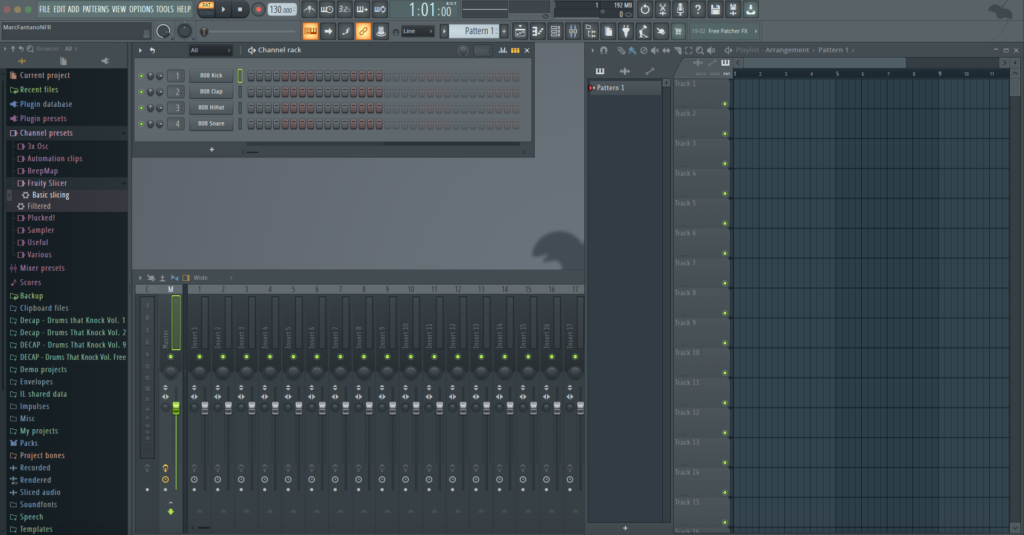
FL Studio channel rack window
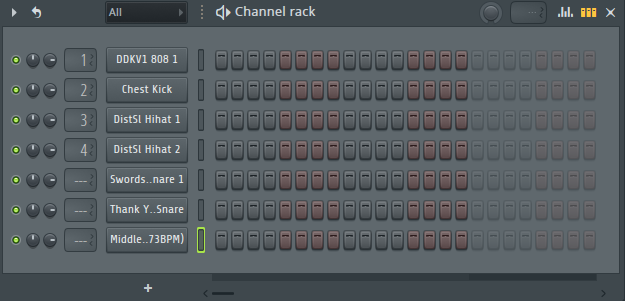
In the channel rack of FL Studio is where you can add the individual sounds you will use for your beat. All you have to do is just drag it over from your the Browser window into the rack. If you don’t have a lot of samples, you’ll want to check out one of the top platforms to buy sound kits and sample packs. Splice and Loopmasters are among the best.
Once your sounds are loaded, you can begin to program your samples. By default the rack opens up 1 bar in the 4/4 time signature, so you’ll get 16 steps to work with. You simply can click in the step to output sound in that sequence to begin making your beat.
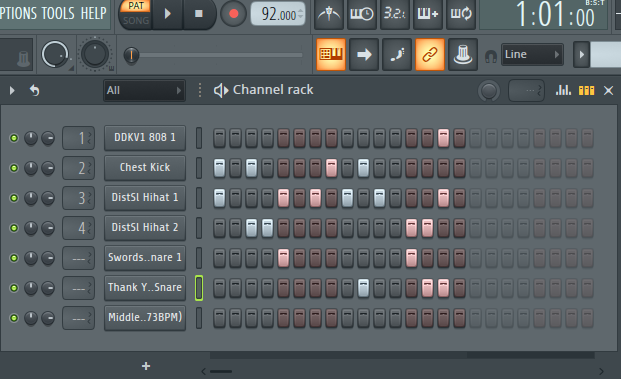
The image below gives you an idea what this could look like in a drum pattern of your beat. The other thing to note is the tempo of the track that your pattern and song will be structured in. That can be adjusted to the right of the toolbar and above the channel rack. In this project, you can see it is set to 92 BPM.
Once you’re satisfied with the loop you’ve created, you can then go back to the playlist window, and begin to paint in the loop to start your arrangement.
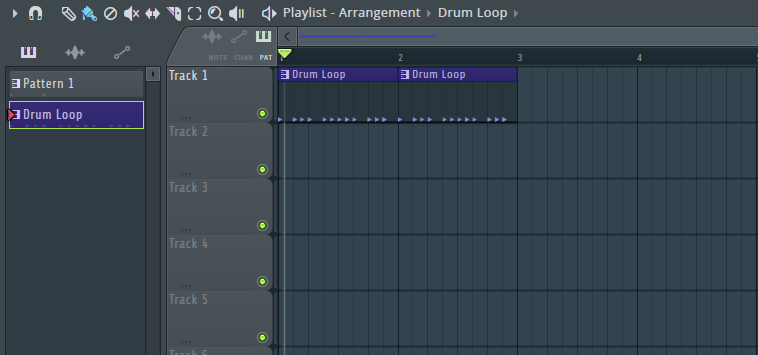
You can also rename and color code your patterns, simply by right clicking on the pattern name and selecting Rename and Color. Since what was just created was a drum pattern, I renamed it Drum Loop.
As a beginner, a good tip is to keep your project organized in a certain structure. It’ll make your process of making beats more efficient once you start to amass a larger catalog and need to go back into older project files.
Opening the FL Studio piano roll
Now it’s time to add some sort of melody to your beat, so you’ll want to create a second pattern. If you purchased the All Plugins edition of FL Studio, you can drag in one of the synths into the channel rack of your new pattern. Then right click on the synth you just dragged in and click Piano Roll. This will bring up your new Piano Roll window.
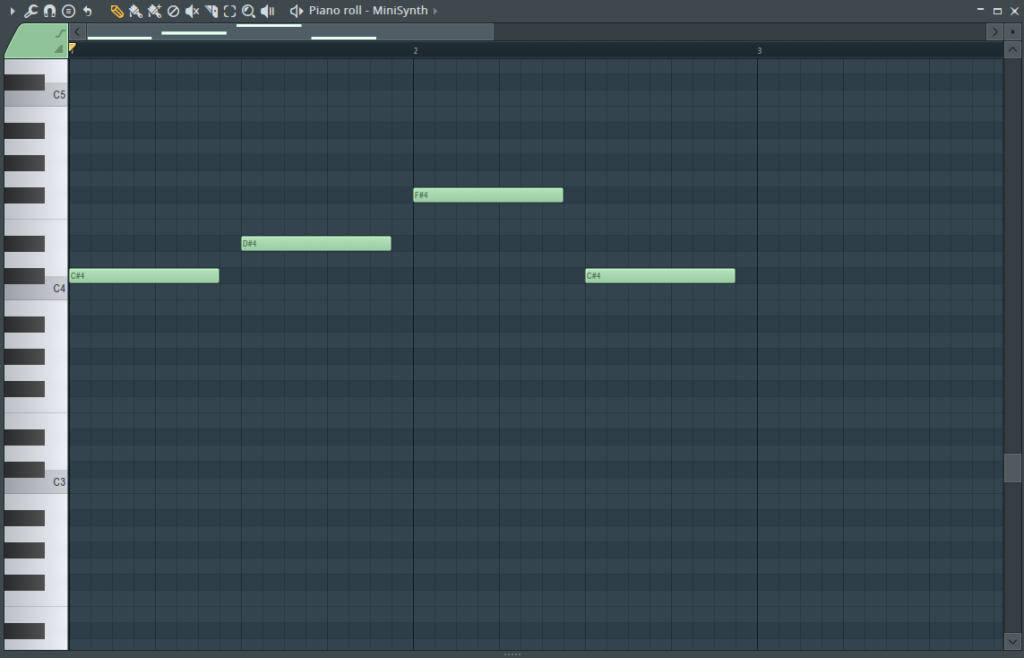
Within the Piano Roll window, you will see the left hand side looks like what you would see on any piano. And if you click within the grid of one of these keys, you can begin to draw out the notes of your melody. Right-clicking the drawn out note will erase it. You can click and drag out the notes to any length of time you desire as well.
Of course, if you own a midi controller, you can also record yourself playing the melody to the beat and then go in and edit the midi notes as you see fit. And similar to the drum pattern, when you’re finished, you can paint this in to the playlist and arrange it on top of the drum pattern.
The FL Studio Mixer window
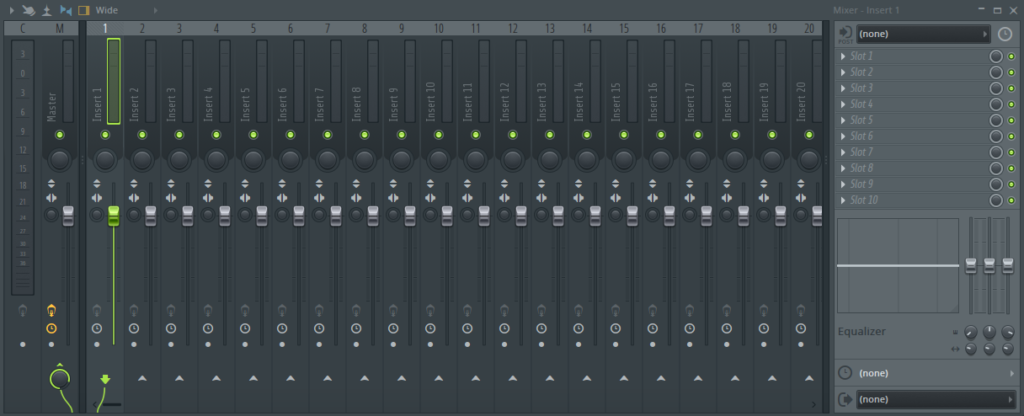
The last component we will take a look at in this FL Studio beginners guide for beatmakers is the Mixer. Here, you’ll be able to adjust the knobs on each individual sound and mix it to your liking. You’ll also be able to adjust the volume on the Master track which is the full song.
Beyond the FL Studio beginners guide for beatmakers
This article was written for absolute beginners of the FL Studio DAW to get acquainted with its user interface. In future weeks, we will plan to release a suite of content geared towards providing tips and tricks for intermediate to advanced users of this music production software.
And once you have a few beats under your belt, read up on the top platforms to sell your beats.