If you’ve landed on this page, chances are you’re curious about how to sample in FL Studio, the leading DAW for making beats. Whether you’re a seasoned beatmaker looking to refine your skills or a beginner eager to dip your toes into the fascinating world of music production, you’ve come to the right place.
As an expert FL Studio user who regularly uses it for sampling, I’ve spent countless hours mastering the art of how to sample in FL Studio. I’ve experienced the thrill of finding the perfect sample, the satisfaction of syncing it to the right tempo, and the joy of transforming it into something entirely new. And now, I’m here to share my knowledge and experience with you.
In this comprehensive guide, we’ll embark on an exciting journey into the world of sampling. We’ll explore how to find and select samples, how to prepare and chop them, and how to manipulate them to create your unique sound. We’ll also delve into some handy tips and tricks to help you overcome common challenges and enhance your skills in FL Studio.
So, put on your headphones, crank up the volume, and let’s dive into the captivating world of how to sample in FL Studio!
Understanding Sampling in FL Studio
Sampling is a fundamental aspect of music production, especially in genres like hip-hop, electronic, and dance music. But what does it mean to sample, and how do you do it in FL Studio?
In the simplest terms, sampling is the art of taking a portion, or “sample,” of one sound recording and reusing it as an instrument or a sound recording in a different song or piece. It’s like taking a slice of your favorite cake and using it to create a whole new dessert. In the context of FL Studio, this could mean taking a drum loop, a vocal phrase, a melody, or any other sound, and incorporating it into your own track.
FL Studio, with its comprehensive suite of tools and features, makes the process of sampling both simple and accessible. It offers a range of stock plugins that you can use to sample sounds. These include Edison, a fully integrated audio editing and recording tool that’s perfect for manipulating samples, and Fruity Slicer, a tool that allows you to chop up samples and rearrange them to create unique beats.
But understanding how to sample in FL Studio isn’t just about knowing how to use these tools. It’s also about developing an ear for good samples, understanding how to fit them into your tracks, and learning how to manipulate them to create the sound you want.
In the following sections, we’ll explore the process of how to sample in FL Studio in more detail, from finding and preparing your samples to chopping and manipulating them. Whether you’re a seasoned producer or a complete beginner, these insights will help you master the art of sampling in FL Studio.
Absolutely, let’s delve deeper into the process of finding your sample when learning how to sample in FL Studio.
Finding Your Sample
Think of finding your sample as going on a treasure hunt. The first step in learning how to sample in FL Studio is finding the right sound to incorporate into your music. This process can be as simple or as complex as you make it, and it often involves a good deal of exploration and experimentation.
There are numerous sources, both free and paid, where you can find samples. Free sources include platforms like YouTube and Looperman, which offer a vast array of sounds from various genres and eras. These platforms can be a goldmine for unique and unexpected samples, but they can also be overwhelming due to the sheer volume of available sounds.
Paid sources, on the other hand, include platforms like Splice and Loopcloud. These platforms offer high-quality, royalty-free samples from professional musicians and producers. While these sources require a financial investment, they can save you time and provide you with a more curated selection of sounds.
You can also use sample packs from producers you admire. These packs often include a range of sounds that are characteristic of that producer’s style, providing you with a ready-made palette of sounds to work with.
When choosing your sample, there are a few things to keep in mind. First, consider the mood and style of the music you’re creating. The sample you choose should complement these elements. Second, avoid samples with drums in the background as it can make your beat sound off. Finally, remember that the best samples are often the ones that inspire you. If a sound moves you, chances are it will move your audience too.
In the end, finding the perfect sample is a bit like finding the perfect ingredient for a recipe. It might take some time and experimentation, but the result is well worth the effort.
Preparing Your Sample
Once you’ve found your treasure (sample), it’s time to prepare it. This is a crucial step in learning how to sample in FL Studio, as it sets the foundation for everything that follows.
Preparing your sample is a bit like prepping ingredients before cooking. You need to clean, cut, and season them before they’re ready to be used. Similarly, in FL Studio, you need to adjust the sample to fit your track.
The first step in preparing your sample is to line it up with the correct tempo. This is akin to setting your oven to the right temperature before baking. In FL Studio, you can adjust the tempo of your sample to match the tempo of your track. This ensures that your sample fits seamlessly into your music. You can use the metronome to ensure the sample is on beat.
Next, you might need to adjust the pitch of your sample. This is like adjusting the flavor of your ingredients to suit your taste. In FL Studio, you can change the pitch of your sample without altering its length using the stretch function. This allows you to adjust the sample to fit the key of your track.
Finally, you might need to clean up your sample. This could involve removing unwanted noise or frequencies, or it could involve enhancing certain elements of the sound. This is like washing your ingredients before cooking. In FL Studio, you can use tools like EQ and compression to clean up and enhance your sample.
Remember, the goal of preparing your sample is to make it fit seamlessly into your track. It’s about making the sample work for you, rather than trying to force your track to fit the sample.
Chopping Your Sample
Once your sample is prepared, it’s time to get creative. Chopping your sample is like carving a sculpture out of a block of marble – it’s where you start to shape your raw material into something unique and beautiful.
In FL Studio, you can use various tools to chop up your sample. One of these is the blade tool, which allows you to cut your sample into smaller pieces. Think of it as your chisel, carving out the rhythm and melody from your sample.
When chopping your sample, don’t be afraid to experiment. Try different cuts and rearrangements to see what works best. You might be surprised at the unique sounds and rhythms you can create from a single sample.
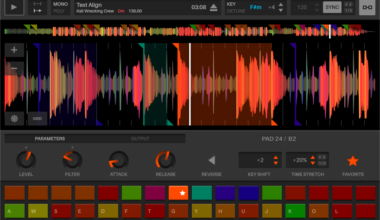
Another powerful tool for chopping samples in FL Studio is the Fruity Slicer. This tool allows you to slice your sample into beats and rearrange them to create a new rhythm. It’s like taking your chiseled pieces of marble and rearranging them to create a new sculpture.
You can also add effects to your chops, like reversing certain sounds. This can add an extra layer of complexity and interest to your sample.
Remember, the goal of chopping your sample is to create something unique. It’s about taking a sound that already exists and transforming it into something that’s uniquely yours. So don’t be afraid to experiment and get creative.
Manipulating Your Sample
After chopping, it’s time to cook (manipulate) your sample. This is where your creativity really comes into play. Just like a chef adds spices and uses cooking techniques to enhance the flavors of their ingredients, you’ll use the tools in FL Studio to manipulate your sample and create a unique sound.
One way to manipulate your sample is by stretching it out. This can change the character of the sound, making it feel slower or faster without changing the pitch. It’s like slow-cooking your ingredients to bring out their flavors. In FL Studio, you can use the time stretching tool to stretch your sample.
Another way to manipulate your sample is by playing around with the pitch. This can give your sample a completely different vibe, making it sound higher or lower. It’s like adjusting the seasoning in your dish to get the perfect flavor. In FL Studio, you can use the pitch knob to change the pitch of your sample.
You can also use effects to clean up and enhance your sample. This might involve adding reverb for a sense of space, using EQ to balance the frequencies, or adding compression to control the dynamics. It’s like adding the finishing touches to your dish to make it look and taste amazing.
Remember, sampling often becomes a game of problem-solving, as manipulating the sample can introduce new challenges, such as gaps between chops or unwanted frequencies. But with the right tools and a bit of creativity, you can overcome these challenges and create a unique sound that’s all your own.
Conclusion, How to sample in FL Studio
Learning how to sample in FL Studio is a journey of exploration and creativity. It’s about discovering new sounds, experimenting with different techniques, and ultimately creating music that is uniquely yours. It’s like being a chef in your own musical kitchen, with the world of sound as your pantry.
Throughout this guide, we’ve covered the basics of how to sample in FL Studio, from finding and preparing your sample to chopping and manipulating it. But remember, these are just the basics. The real magic happens when you start to experiment and find your own unique approach to sampling.
Don’t be afraid to try new things and make mistakes. Just like in cooking, sometimes the most delicious dishes come from unexpected combinations and happy accidents. So, put on your chef’s hat, roll up your sleeves, and start creating your unique musical dish with FL Studio.
And remember, the most important ingredient in any piece of music is you. Your creativity, your passion, and your unique perspective are what make your music special. So, don’t be afraid to let your personality shine through in your samples.
In the end, learning how to sample in FL Studio isn’t just about making music. It’s about expressing yourself, telling a story, and connecting with others through sound. So, keep exploring, keep experimenting, and most importantly, keep making music.

