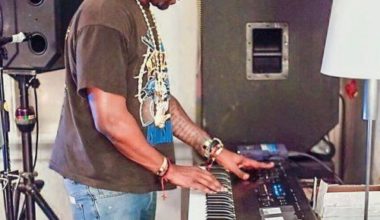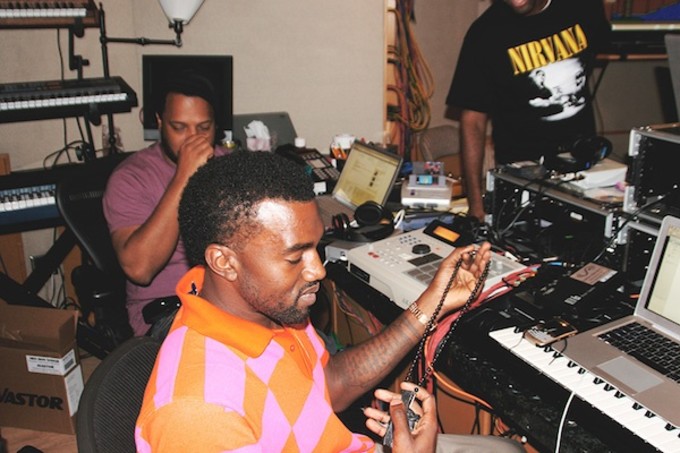
Picture this: You’re a music producer, and you’ve just stumbled upon a goldmine of a sample. It’s got that vintage vibe, that soulful melody, that gritty texture that you just can’t get with modern synths. You’re excited, you’re inspired, you’re ready to flip this sample and create a beat that would make Kanye West himself nod in approval. But where do you start? How do you flip samples like Kanye West in FL Studio?
Well, buckle up, because we’re about to embark on a journey into the art of sample flipping. It’s like being an archaeologist, digging through layers of sound to uncover hidden gems. Or a chef, taking raw ingredients and transforming them into a delicious dish. It’s a process that requires patience, creativity, and a keen ear for detail.
In this guide, we’ll walk you through the process step by step, from finding the right sample to adding the final touches to your beat. We’ll share tips and tricks used by Kanye West, one of the masters of sample flipping, to help you develop your own unique style. So grab your headphones, fire up FL Studio, and let’s dive into the world of sample flipping.
Step 1: Finding the Right Sample: The Hunt for the Perfect Sound
The first step in flipping samples like Kanye West is, of course, finding the right sample. This is like being an explorer on a treasure hunt, navigating through the vast landscape of sound to find that one perfect gem. It’s a process that requires patience, a keen ear, and a bit of luck.
In this case, we’re using a sample from an online record store for sampling. They have a vast library of original songs to sample from, making it easy to find the perfect sample for your beat. It’s like having a map that leads straight to the treasure.
But what makes a sample “right”? Well, it’s not just about the sound. It’s about how that sound makes you feel. It’s about the emotions it evokes, the images it conjures, the story it tells. A great sample is one that resonates with you on a deep, personal level. It’s a sound that speaks to you, that inspires you, that sparks your creativity.
So, how do you find such a sample? Start by exploring different genres and eras of music. Dive into the depths of jazz, soul, funk, rock, classical, and more. Listen to music from different parts of the world. Open your mind to new sounds, new rhythms, new melodies.
Once you’ve found a potential sample, listen to it closely. Pay attention to the different elements of the track – the melody, the rhythm, the harmony, the texture. Look for moments that stand out, that catch your ear, that make you say “Wow, that would sound great in a beat!”
Remember, the goal is not to find a sample that sounds good on its own, but one that will sound good when flipped into a beat. So, keep an open mind, trust your instincts, and enjoy the hunt. After all, finding the right sample is half the fun of sample flipping.
Step 2: Preparing the Sample: The Art of Musical Mise en Place
Once you’ve found your sample, it’s time to prepare it. This is like the mise en place in cooking, where you gather and prep all your ingredients before you start cooking. In the world of sample flipping, preparation is key to ensuring a smooth and efficient workflow.
First, you need to set your project BPM to match the sample’s BPM. This ensures that your sample is in time with your beat. It’s like making sure your ingredients are all cut to the same size so they cook evenly. In FL Studio, you can use the tempo tapper or the beat detection tool to determine the BPM of your sample.
Next, you need to trim your sample. This involves cutting out any unwanted parts of the sample, leaving only the parts you want to use in your beat. It’s like trimming the fat off a piece of meat or peeling a vegetable. In the top DAW to make beats, you can use the Edison editor to trim your sample with precision.
Finally, you need to normalize your sample. This adjusts the volume of the sample to a standard level, ensuring that it’s not too loud or too soft compared to the other elements of your beat. It’s like seasoning your ingredients to bring out their flavors. In FL Studio, you can use the normalize function in the Edison editor to normalize your sample.
By preparing your sample in this way, you ensure that it’s ready to be flipped into a beat. It’s a crucial step in the process, one that sets the foundation for everything that follows. So take your time, pay attention to the details, and remember: good preparation leads to great results.
Step 3: Chopping the Sample: The Joy of Musical Deconstruction
Now comes the fun part: chopping the sample. This is where you get to flex your creative muscles and really make the sample your own. It’s like being a sculptor, taking a block of marble and chipping away at it until you reveal the masterpiece within.
In FL Studio, you can use the Fruity Slicer tool to chop your sample into different sections. It’s like having a set of chisels, each one designed to make a different kind of cut. You can chop your sample into beats, bars, or even individual notes, depending on what you’re trying to achieve.
Once you’ve chopped your sample, you can start playing around with the pieces. Try rearranging them in different orders to create a new melody. Play them backwards, forwards, or in a completely random order. It’s like taking a puzzle and putting the pieces together in a new and unique way.
But remember, chopping is not just about cutting up the sample. It’s also about listening to the sample, understanding its structure, and finding the hidden rhythms and melodies within it. It’s about discovering the potential in the sample and bringing it to life in your beat.
So, grab your virtual chisel and start chopping. And remember, there’s no right or wrong way to do it. It’s all about experimentation, creativity, and having fun. After all, the best beats are born out of play, not work. So go ahead, play with your sample, and see what kind of musical magic you can create.
Step 4: Adding Drums: The Heartbeat of Your Beat
Once you’ve chopped your sample and created a melody, it’s time to add some drums. This is like adding the heartbeat to your musical body. It’s the rhythm that drives your beat, the pulse that gives it life.
In FL Studio, you can add a variety of drum sounds, from kicks and snares to hi-hats and cymbals. It’s like having a drum kit at your fingertips, ready to lay down a beat at a moment’s notice.
Start by adding a kick drum. This is the thump, the boom, the low-end punch that gives your beat its weight. It’s like the bass note in a chord, providing the foundation upon which everything else is built.
Next, add a snare. This is the crack, the snap, the high-end pop that gives your beat its bite. It’s like the spice in a dish, adding a kick of flavor that cuts through the mix.
Then, add some hi-hats. These are the sizzle, the fizz, the rhythmic hiss that gives your beat its groove. It’s like the bubbles in a soda, adding a refreshing fizz that keeps the beat moving.
Finally, don’t forget to play around with the velocity and timing of your drums. This can give your beat a more natural, human feel. It’s like cooking on a stove instead of a microwave, adding a touch of warmth and authenticity to your beat.
Adding drums to your beat is a crucial step in the sample flipping process. It’s what turns a melody into a beat, a loop into a song. So take your time, experiment with different sounds and rhythms, and most importantly, have fun with it. After all, making beats is supposed to be fun, right?
Step 5: Adding Bass: The Soulful Undercurrent of Your Beat
The final step in flipping samples like Kanye West is adding bass. This is like adding the undercurrent to your musical river. It’s the deep, soulful pulse that flows beneath the surface of your beat, giving it depth and warmth.
In FL Studio, you can use a variety of bass sounds, from deep, subby basses to punchy, mid-range basses. It’s like having a palette of different shades of blue, each one adding a different depth and texture to your musical canvas.
Start by choosing a bass sound that complements your sample. This is like choosing the right shade of blue for your painting. It needs to match the mood and tone of your sample, enhancing its vibe without overpowering it.
Next, write a bassline that follows the rhythm and melody of your sample. This is like painting the undercurrent in your river, following the flow of the water while adding depth and movement. In FL Studio, you can use the Piano Roll to write your bassline, adjusting the pitch and timing of each note to match your sample.
Finally, play around with the volume and EQ of your bass. This can help your bass sit nicely in the mix, ensuring that it’s heard but not overpowering. It’s like adjusting the depth of your undercurrent, making sure it’s strong enough to be felt but not so strong that it overwhelms the river.
Adding bass to your beat is the final touch in the sample flipping process. It’s what gives your beat its fullness, its richness, its soul. So take your time, experiment with different sounds and rhythms, and most importantly, have fun with it. After all, making beats is all about expressing your soul, right?
Conclusion: The Final Beat and the Joy of Creation
And there you have it! You’ve just flipped a sample like Kanye West in FL Studio. You’ve taken a raw sample, chopped it up, rearranged it, and added drums and bass to create a unique, soulful beat. It’s like taking raw ingredients and turning them into a delicious dish. But remember, this is just one way to flip samples. The beauty of music production is that there are no rules. So feel free to experiment, try new techniques, and most importantly, have fun with it.
After all, the best beats are made when you’re having fun. It’s the joy of creation, the thrill of discovery, the satisfaction of seeing your ideas come to life in the form of a beat. It’s what keeps us coming back to the studio, day after day, night after night. It’s what makes us music producers.
So go ahead, fire up FL Studio, and start flipping samples. Dive into the vast ocean of sound, explore the depths of your creativity, and see what kind of musical treasures you can uncover. And remember: the journey is just as important as the destination. So enjoy the process, learn from your mistakes, and never stop creating.
And who knows? Maybe one day, someone will be asking how to flip samples like you.